How to Bulk Translate Content Easily Using Google Sheets
Estimated time: 15-30 minutes
 If you have lots of content and are looking to translate it into multiple languages, this is the guide for you. In this walkthrough, you'll learn how to translate thousands of records of content into multiple languages quickly and easily using Google Sheets.
There are 6 steps in this guide:
Before Getting Started
Every CMS is different and this is a generic guide to using Google Sheets to translate large volumes of content. Before we get started, you'll want to review:
How to export content from your CMS
How to import content to your CMS
Understanding how your CMS handles multiple languages. Some need to have the new language activated before moving forward importing content - check your CMS' documentation to confirm.
For this guide, we'll be using our demo site ZFLIX as an example. In our example, we'll export the Movies and Shows content model and translate this content to French.
Please keep in mind this uses the Google Translate API which may not be 100% accurate translations.
Step 1: Export content from the CMS.
This step varies as every CMS is different. Usually, exporting content from your CMS is fairly simple. We recommend visiting your CMS' documentation site (docs) and searching for "content export."
Most exports will come in a CSV format, which is what we want for this tutorial. If yours does not come in a CSV format, please convert your file to CSV before proceeding.
Zesty.io users: Zesty.io can export up to 5000 records at once. Please reference this documentation to learn how.
Step 2: Upload your export to Google Sheets.
This step you've likely done before. Take the CSV of content you've just exported and import it into Google Sheets.
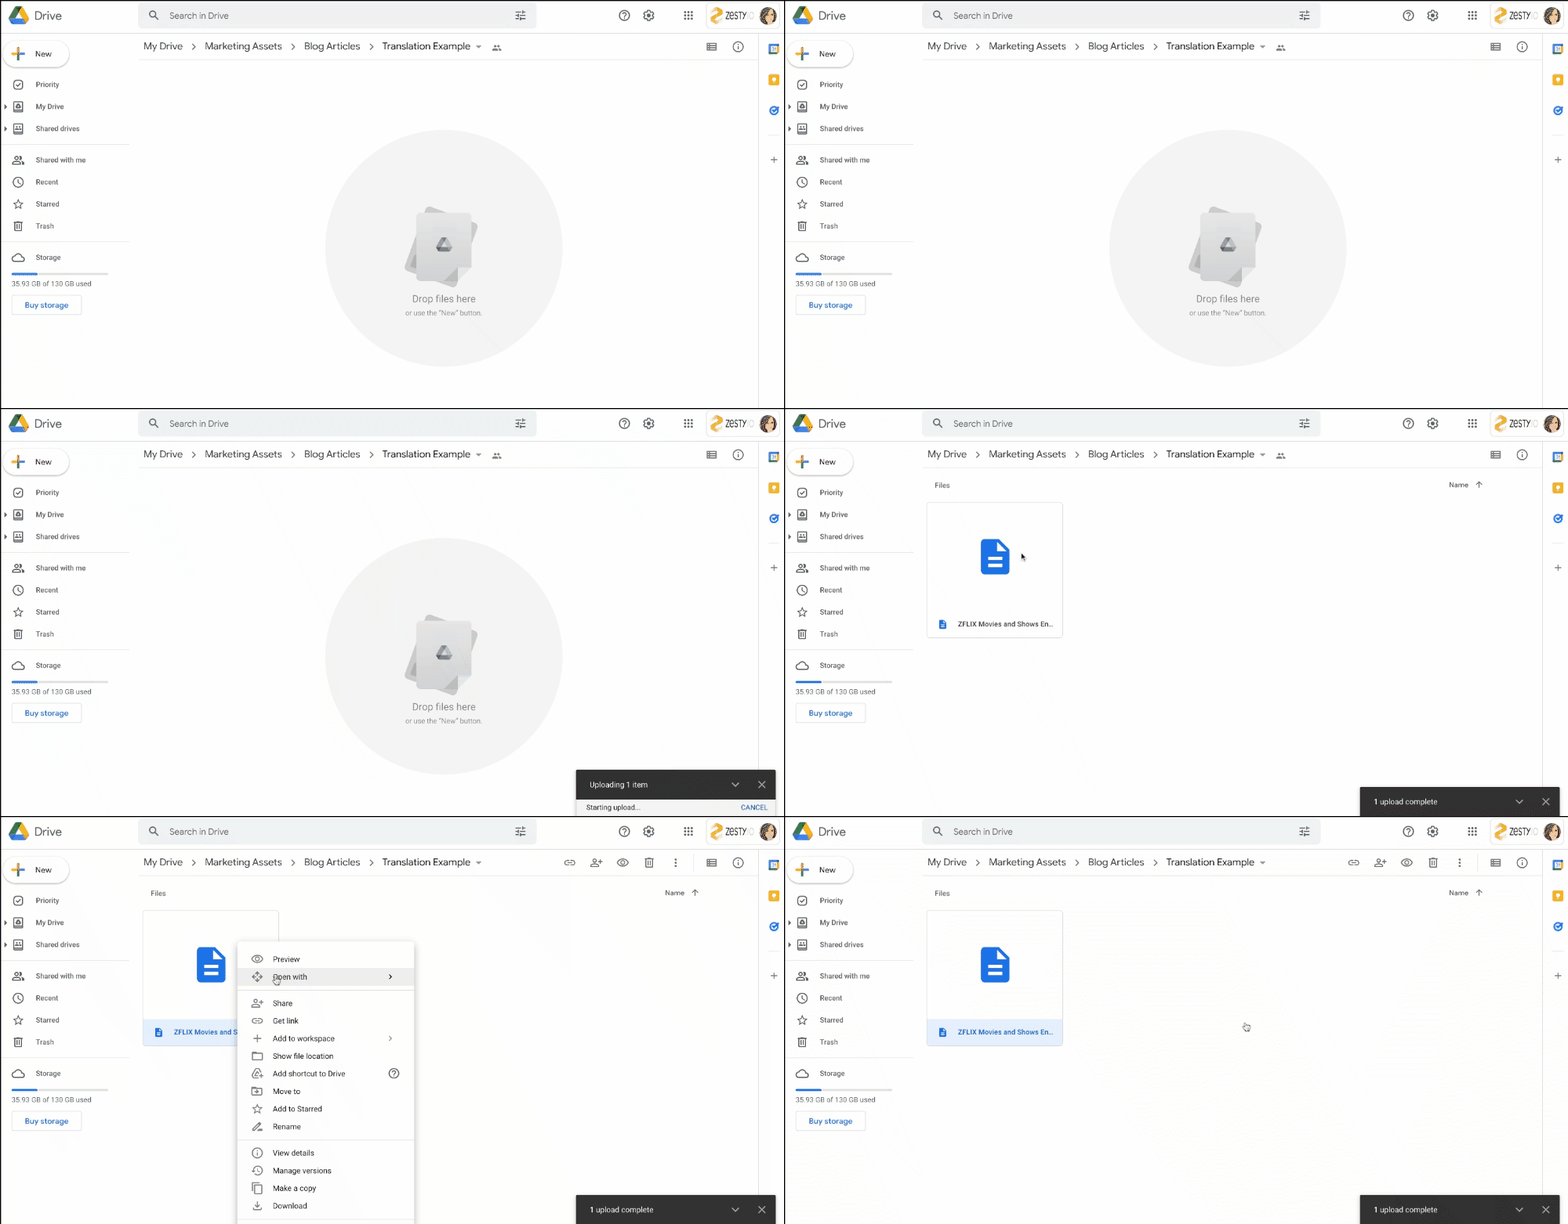
Make sure that when you import your CSV, you right click and open the file in Google Sheets. This will convert your CSV to a Google Sheets file, which we'll need for the next step.
Step 3: Create a new sheet for translated content.
Your uploaded file should look something like this:
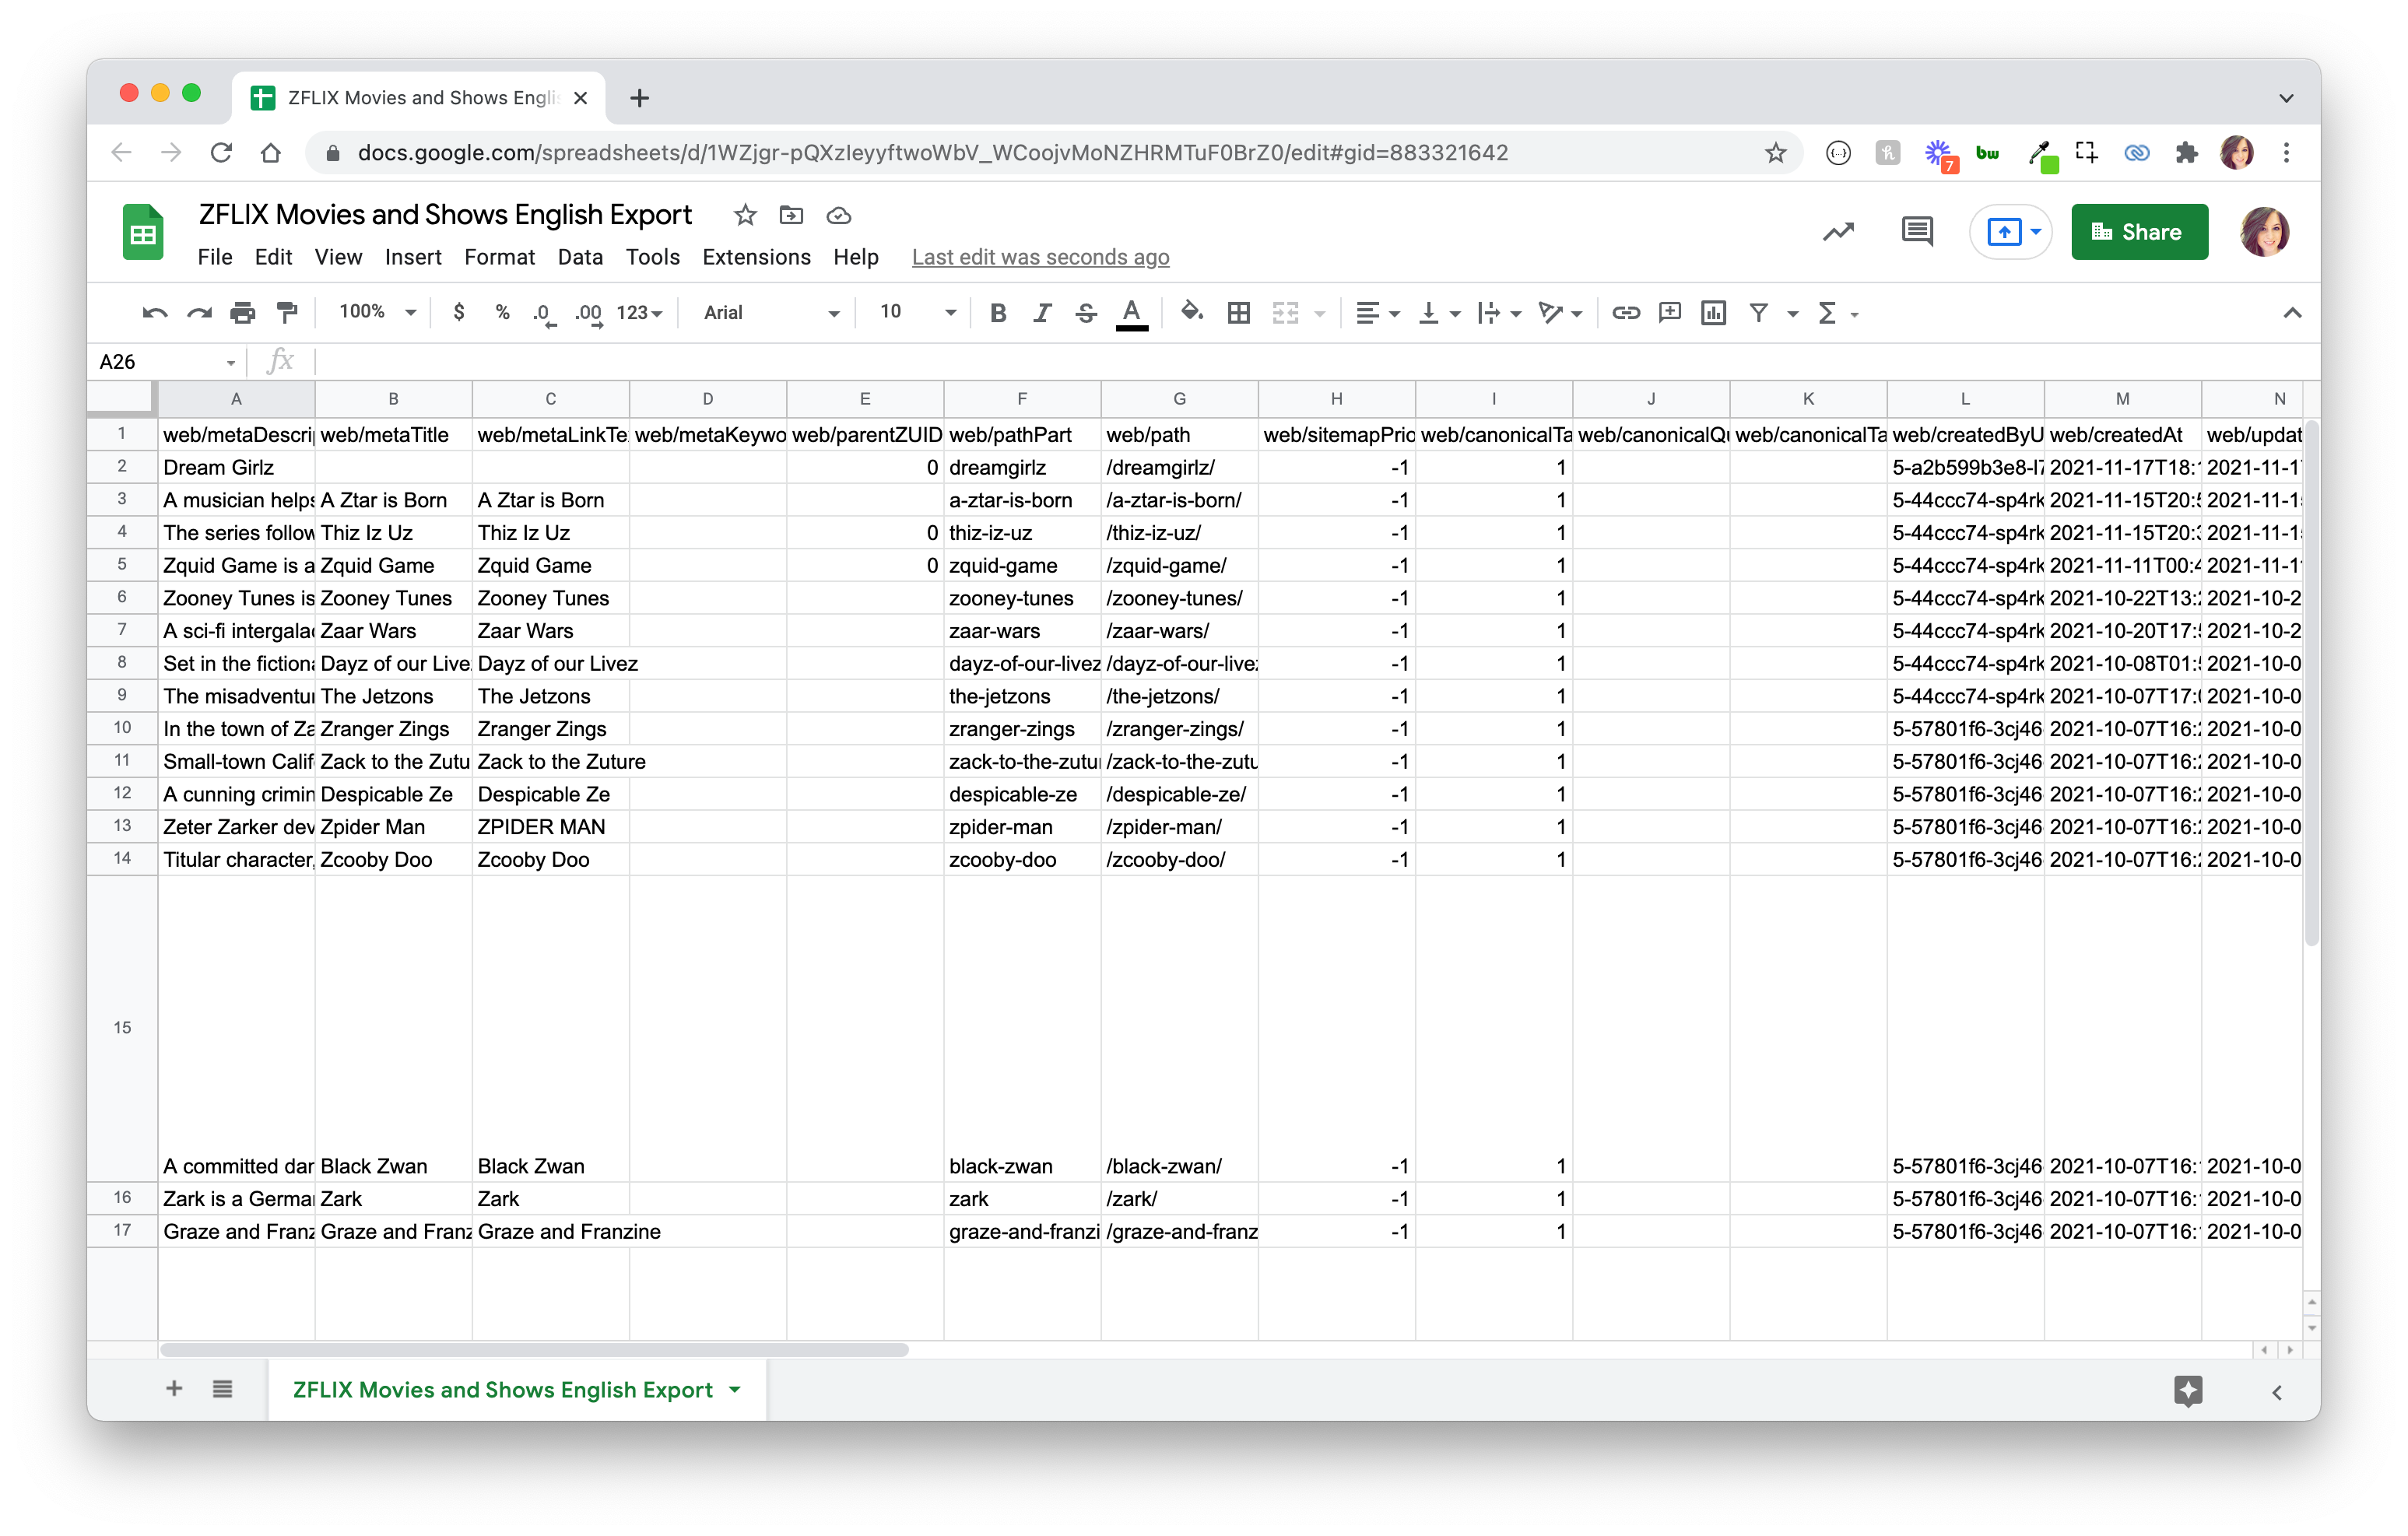
Please note: your uploaded file may look slightly different if you're using a different CMS.
Zesty.io users: you'll notice the top row is all of your pertinent information, including meta information, as well as ZUID data.
Create a new sheet using the + Button in the bottom left hand corner. With your blank sheet, you'll want to copy over just the content you want to translate. In our case, we've copied over the meta information. You'll also want to add a column in between, where your translated content will go.
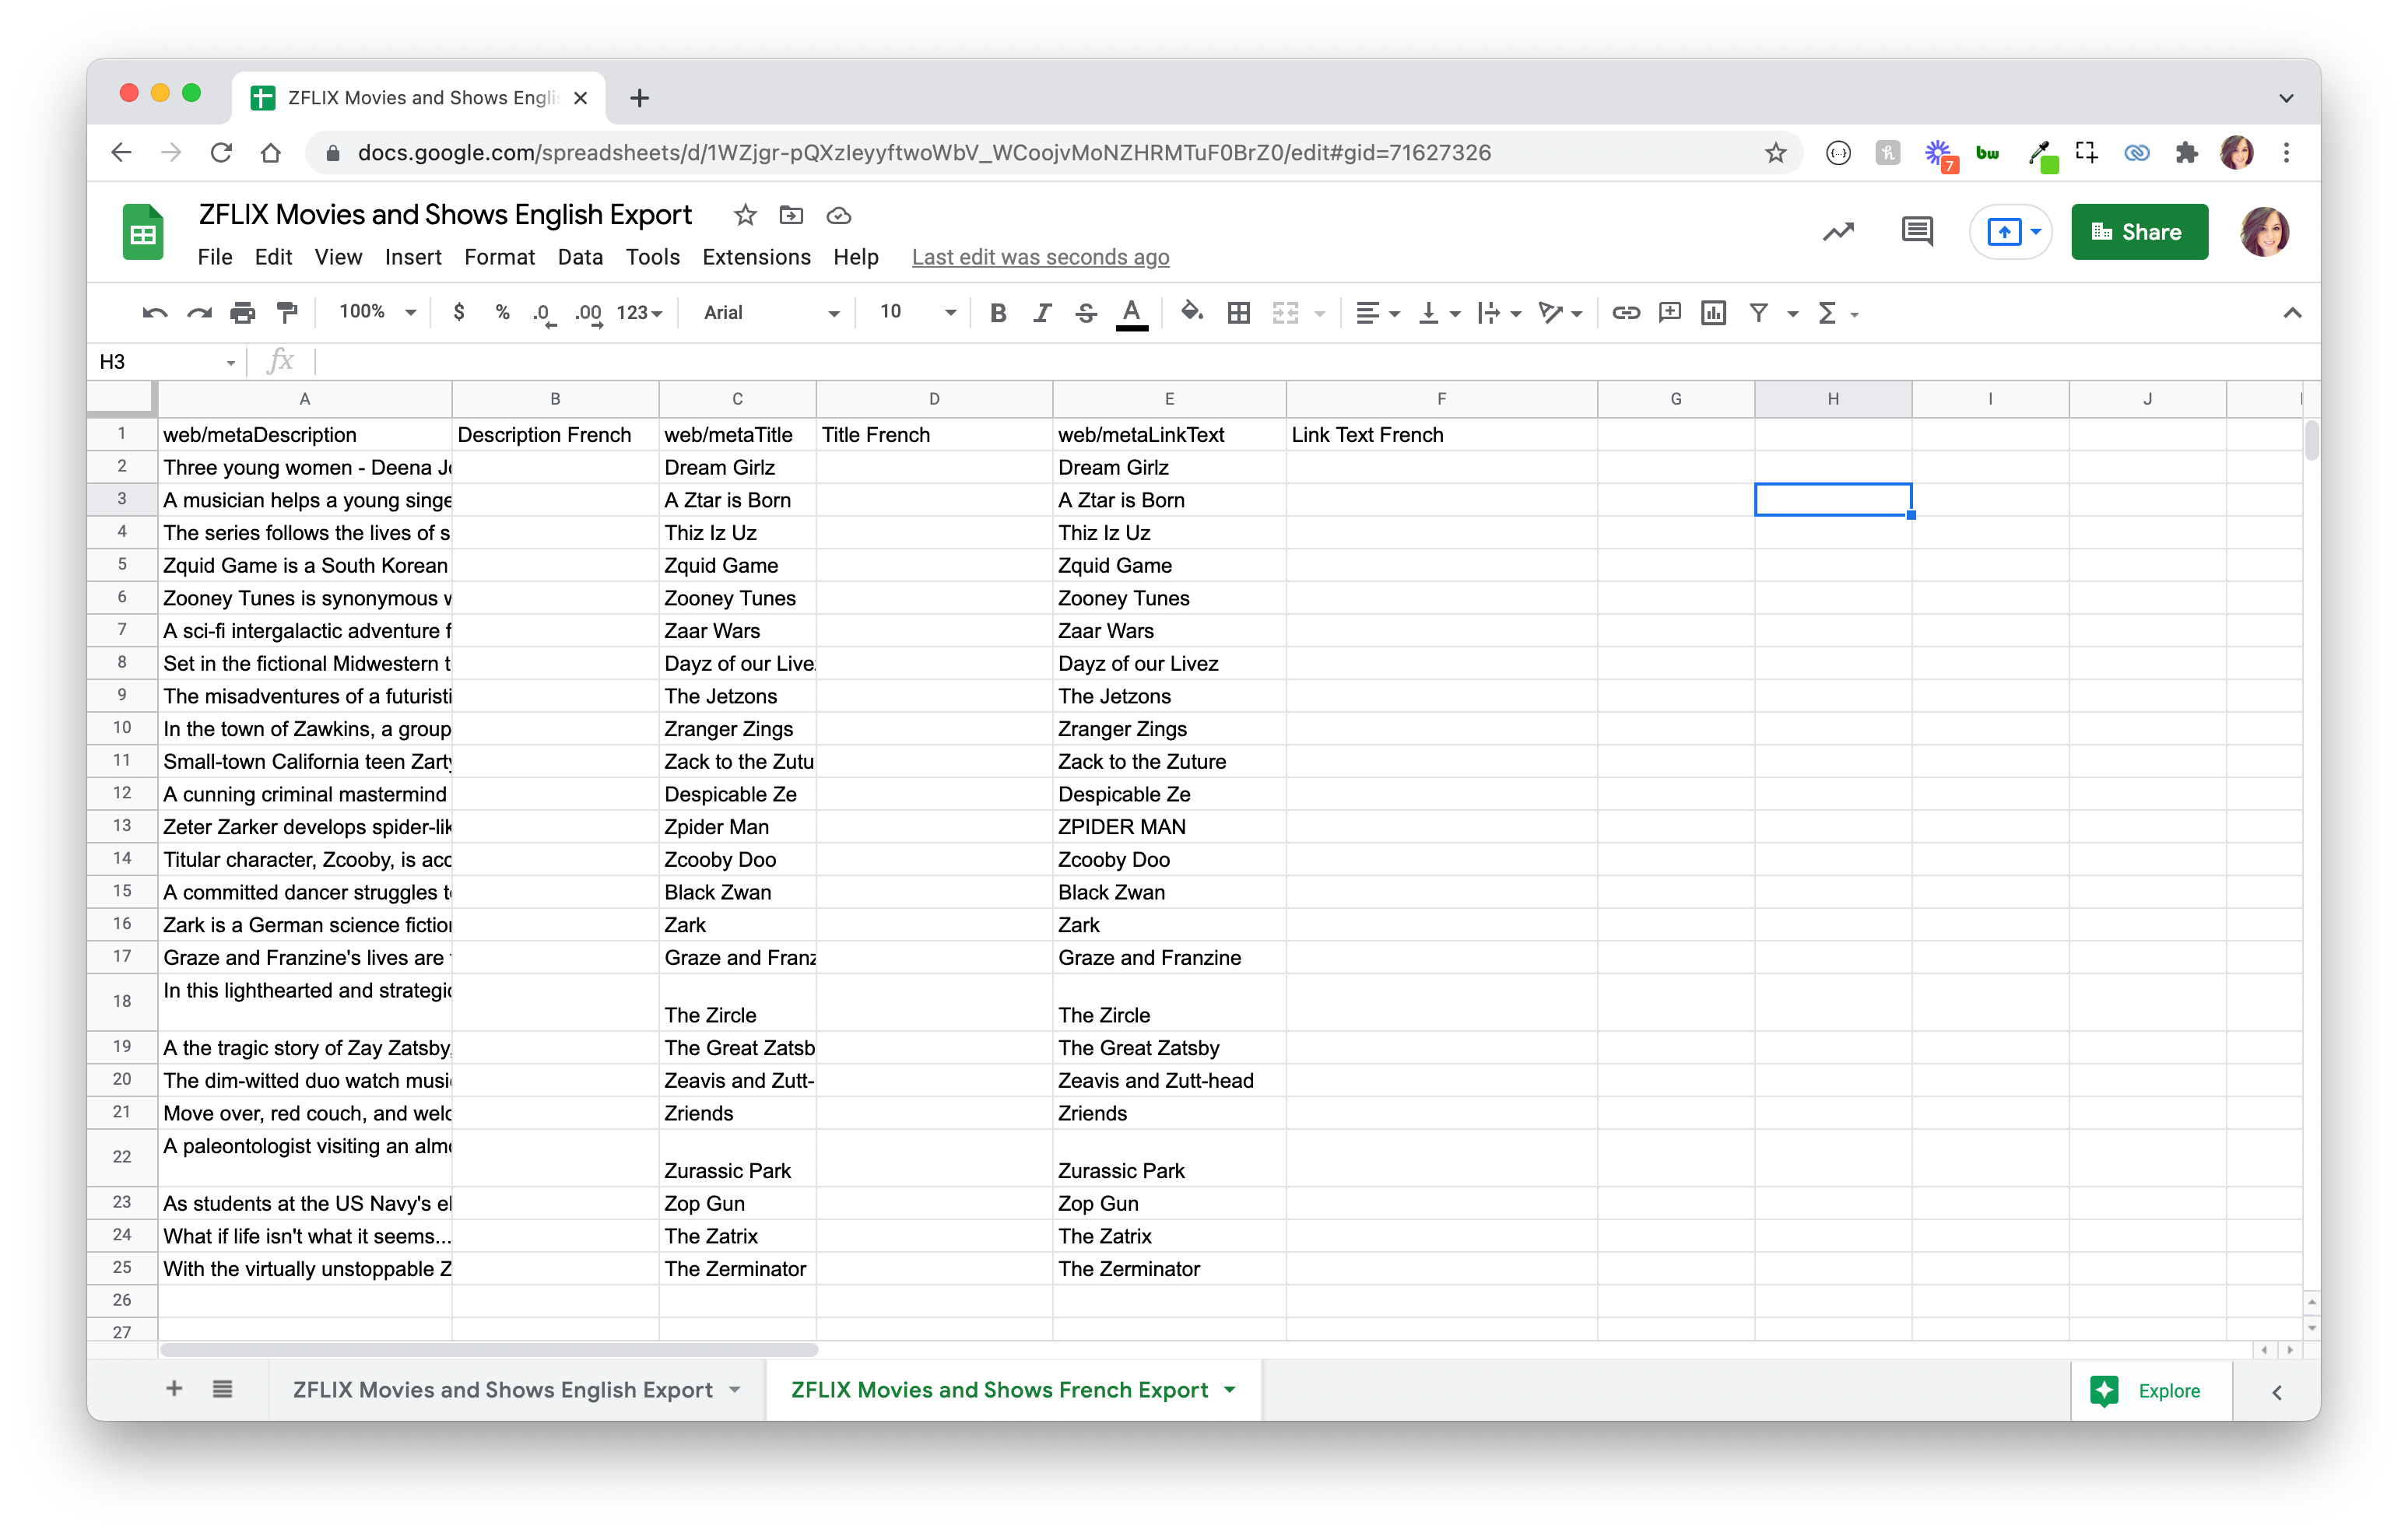
Step 4: Translate content using Google Translate function.
This is the fun part! Use the Google Sheet's Translate function to translate content to your desired language.
=GOOGLETRANSLATE(reference, "[source_language_code", "target_language_code]")
Not sure what your source language code or target language code is? You can find the full list in Google's documentation here, but here are some common references:
Language | Language Code |
English | en |
Spanish | es |
French | fr |
Portuguese | pt-PT for Portugal, pt-BR for Brazil |
German | de |
Chinese | zh-CN |
Japanese | ja |
Hindi | hi |
Russian | ru |
Here's an example of one item being translated. Make sure to wrap your language codes in quotation marks, or else this formula won't work.
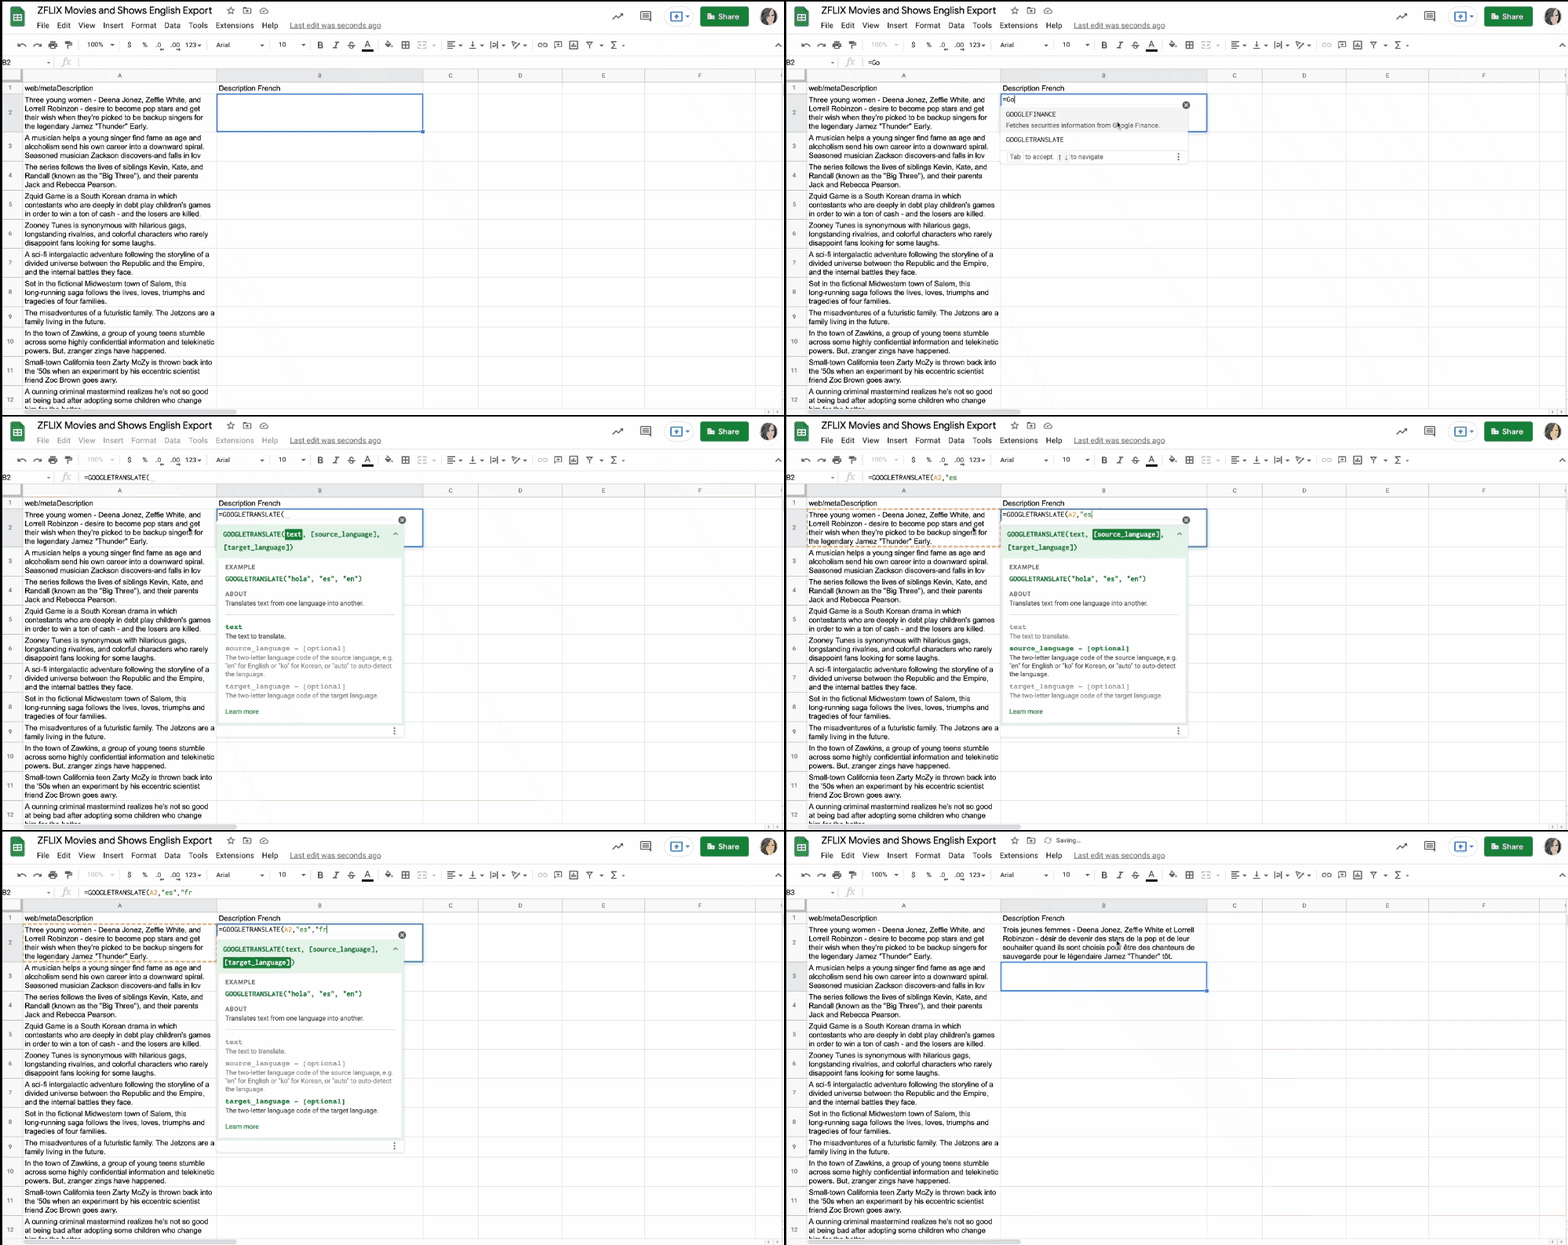
Once you've got one, you can click on the corner of the translated cell and drag down, copying your formula to all of the cells you want to translate.
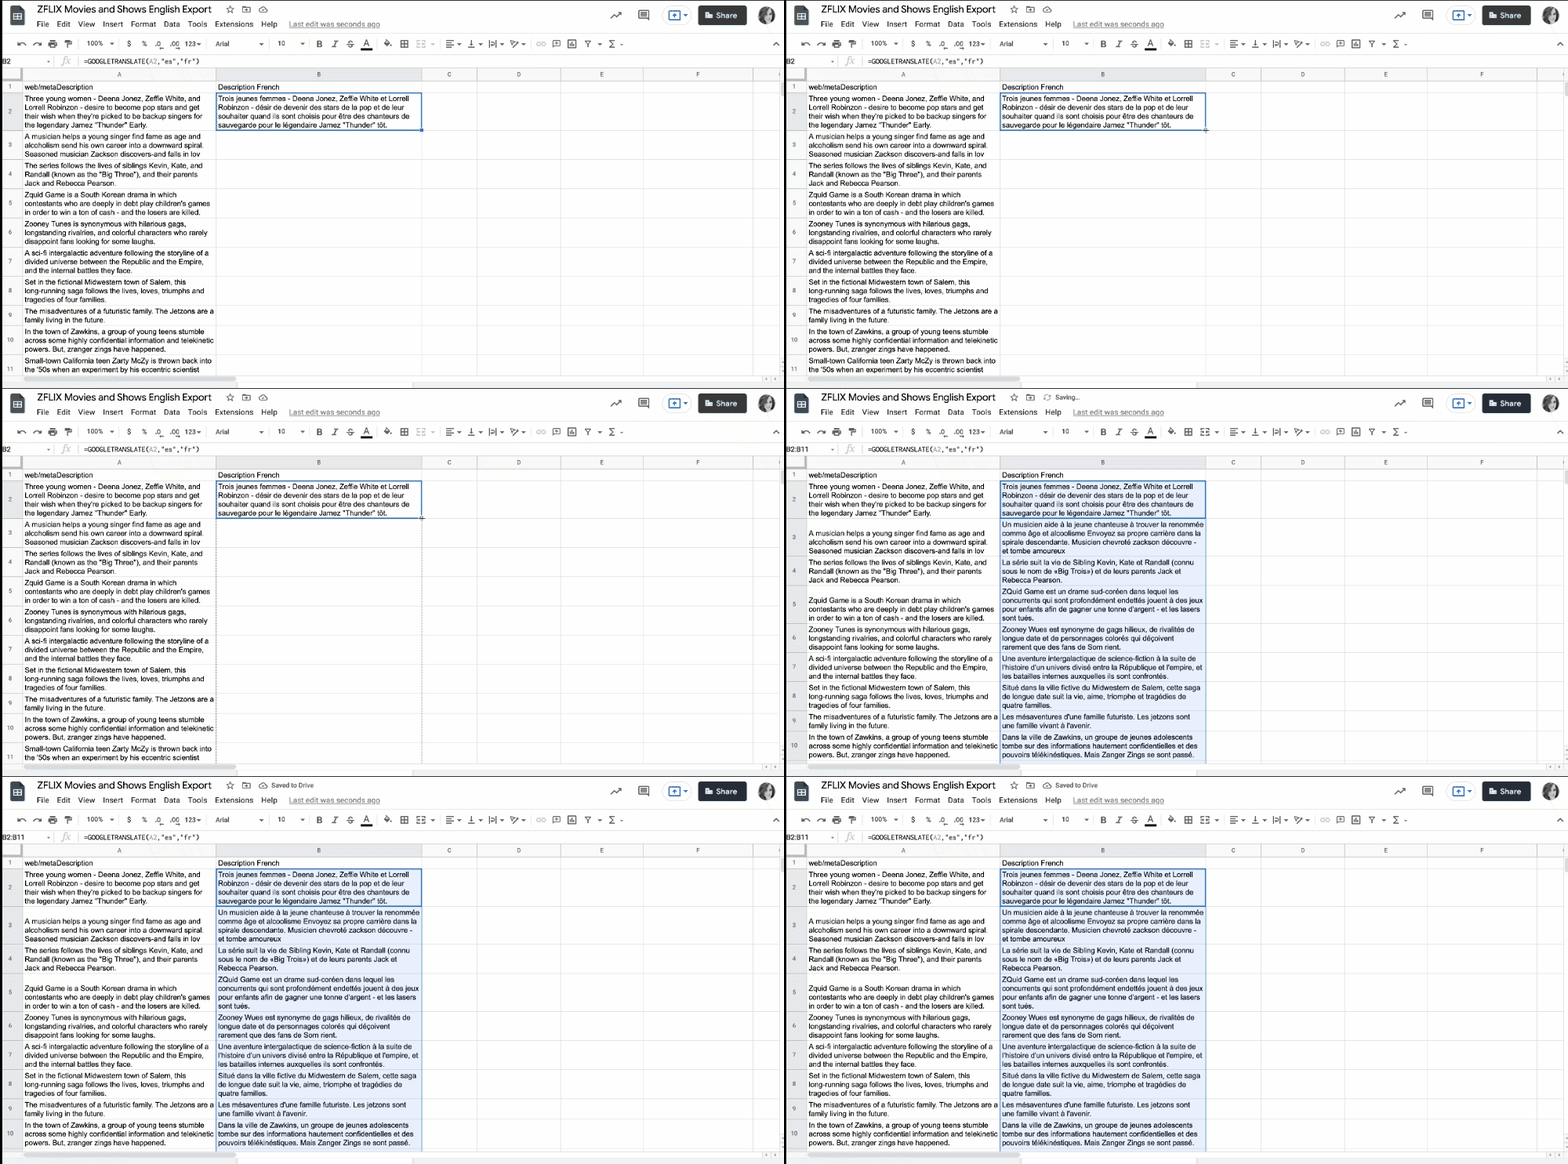
Once you're completed, your sheet should be fully translated. Remove the original content, and you've got a CSV of translated content ready to go!
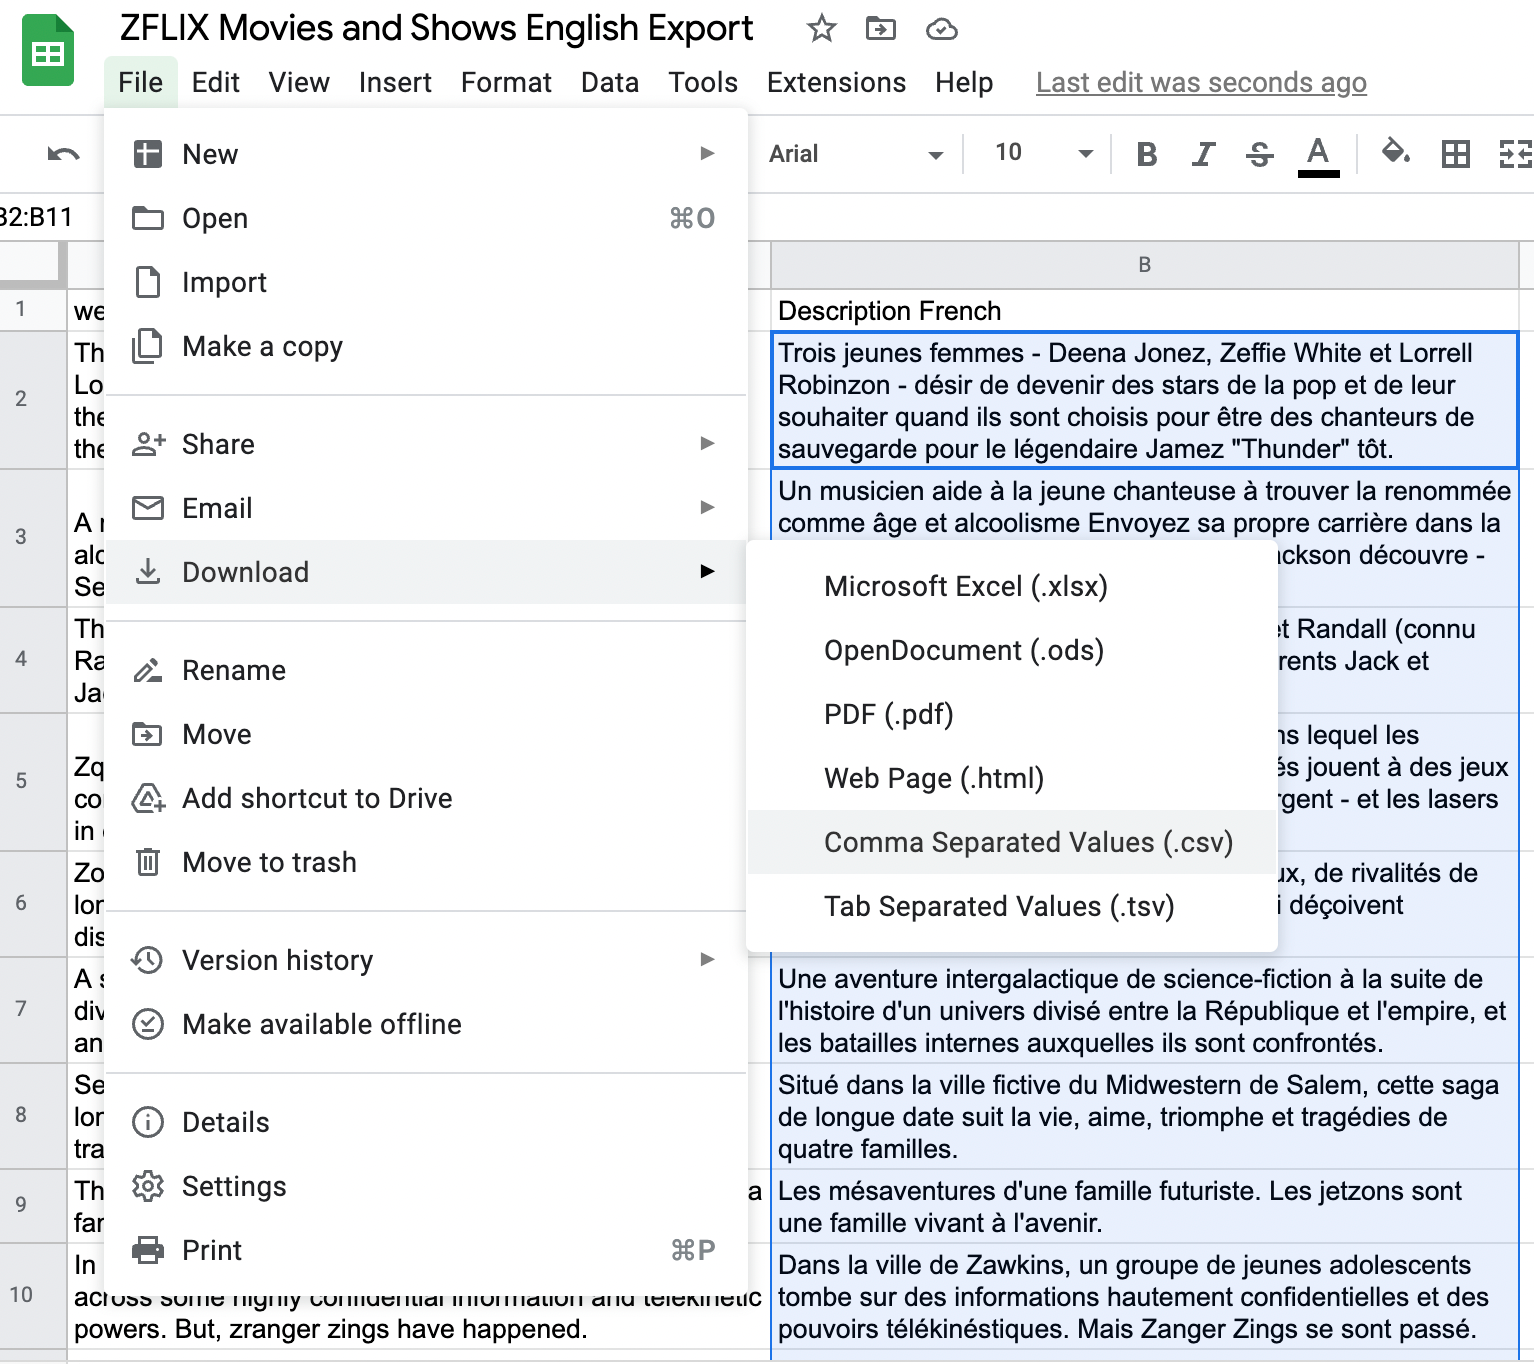
Step 5: Import translated content to the CMS.
This step varies per CMS, so please refer to the documentation for your CMS to learn how to bulk upload records.
For Zesty.io users: please make sure you have the new language enabled for your instance (not sure how? Here's the documentation). When you're ready, you can bulk update records in the language you want using this guide.
Step 6: Publish translated content.
After importing all of your content, please go to the CMS and make sure everything looks good. Once you've confirmed everything is the way you'd like, publish all of your new pages, and sit back and relax now that you've successfully translated your content.
For Zesty.io users: to bulk publish, either use the Release App, or publish all of the records you just updated using the API.
Et voila! You're done! Rinse and repeat for as many languages as you like.