While platforms such as Google Analytics are actively working to comply with applicable data protection laws, it’s imperative that you protect your website as well and ensure GDPR compliance through data collection. In this walkthrough, we teach you how to use cookies and Javascript to ensure that the data you are collecting on your website through Google Analytics was allowed by your user.
For the walk through, you can find more detail in our developer documentation guide on ensuring Google Analytics and GDPR compliance on your Zesty.io website. We are going to check for a cookie named trackMe. If that cookie is null, we will show a popup asking the user if its ok to run GA. If the cookie value is true, we will run the GA script. If it is false, we do not run the GA script.
Step 1: Prepare Javascript to Check and Set Cookies
Since Javascript can access cookies, we’ll use functions to set and check a cookie value.
function setCookie(name,value,days=30) {
    var expires = "";
    if (days) {
        var date = new Date();
        date.setTime(date.getTime() + (days*24*60*60*1000));
        expires = "; expires=" + date.toUTCString();
    }
    document.cookie = name + "=" + (value || "")  + expires + "; path=/";
}

function getCookie(name) {
    var nameEQ = name + "=";
    var ca = document.cookie.split(';');
    for(var i=0;i < ca.length;i++) {
        var c = ca[i];
        while (c.charAt(0)==' ') c = c.substring(1,c.length);
        if (c.indexOf(nameEQ) == 0) return c.substring(nameEQ.length,c.length);
    }
    return null;
}

function eraseCookie(name) {
    document.cookie = name+'=; Max-Age=-99999999;';
}
Step 2: Tell Google Analytics When to Load
Since we’re checking for permissions stored in the cookie before allowing Google Analytics or Google Tag Manager to load, we need to remove the auto-load setting.
Step 2a: Remove Google Analytics and Google Tag Manager Auto-Load Settings
Remove all the GA and GTM script tags from the loader view file in the editor in Zesty.io and save it. If you are using Zesty.io GA auto loader, you need to delete the setting. You can delete the GA settings in Schema > Settings > Analytics.
Step 2b: Create an Analytics Loading Function
Now that Google Analytics and Google Tag Manager will not automatically load, we need to tell these programs when they are allowed to load on the site.
We will want to setup a function to run Google Analytics, that way we can run it as a user accepts, and run it when we check the trackMe cookie.
function loadGoogleAnalytics(){
var UACODE = "UA-XXXXXXX-X";
var GTMCODE = "GTM-XXXXXXX";
// run GA tracking scripts
(function(i,s,o,g,r,a,m){i['GoogleAnalyticsObject']=r;i[r]=i[r]||function(){
(i[r].q=i[r].q||[]).push(arguments)},i[r].l=1*new Date();a=s.createElement(o),
m=s.getElementsByTagName(o)[0];a.async=1;a.src=g;m.parentNode.insertBefore(a,m)
})(window,document,'script','https://www.google-analytics.com/analytics.js','ga');
ga('create', UACODE, 'auto');
ga('send', 'pageview');
document.write('<script async src="https://www.googletagmanager.com/gtag/js?id='+UACODE+'"><\/script>');
window.dataLayer = window.dataLayer || [];
function gtag(){dataLayer.push(arguments);}
gtag('js', new Date());
gtag('config', UACODE);
(function(w,d,s,l,i){w[l]=w[l]||[];w[l].push({'gtm.start':new Date().getTime(),event:'gtm.js'});var f=d.getElementsByTagName(s)[0],j=d.createElement(s),dl=l!='dataLayer'?'&l='+l:'';j.async=true;j.src='https://www.googletagmanager.com/gtm.js?id='+i+dl;f.parentNode.insertBefore(j,f);})(window,document,'script','dataLayer',GTMCODE);
document.write('<noscript><iframe src="https://www.googletagmanager.com/ns.html?id=GTM-5RKTZZ4" height="0" width="0" style="display:none;visibility:hidden"></iframe></noscript>');
}Step 3: Create a Pop-Up for New Visits
Now that we’ve told GA and GTM when it’s appropriate to load, we need to create a prompt for all unrecognized sessions to let us know their privacy preference. This is also where marketers get to be creative!
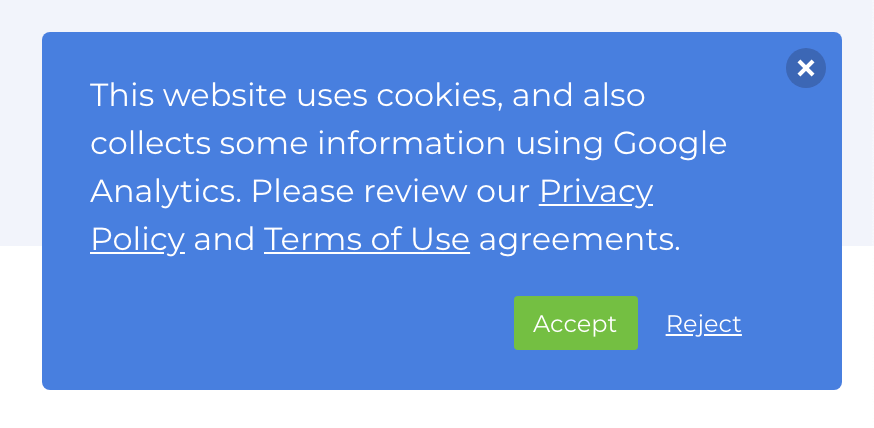
Pop-ups can appear really anywhere on the screen. Depending on your company, some more intrusive pop-ups may be appropriate. For example, a financial institution may need to have additional precautions when it comes to privacy and data collection, so perhaps the rest of the website is inaccessible until a user responds to the prompt on the pop-up asking privacy preferences. Ours looks like this, and pops up in the bottom left hand corner:

Developers will have to check for a cookie using the getCookie function to load or not load this:
if (getCookie('trackMe') == null) {
    // run popup code
}
Step 4: Connect Buttons to Set Preferences on the Cookie
Now, we want to assign each button on the pop-up (ACCEPT or REJECT) to the cookie trackMe to store the user's preference.
document.getElementById("myAcceptBtn").addEventListener(
    "click",
    setCookieAndLoad()
);

// this function is set this way so we do not have to reload the page
function setCookieAndLoad(){
    setCookie('trackMe',true,356);
    loadGoogleAnalytics();
}

document.getElementById("myRejectBtn").addEventListener(
    "click",
    setCookie('trackMe',false,356)
);
Step 5: Check the Cookie
If the cookie is true, we will want to run the load
if (getCookie('trackMe') == true) {
   loadGoogleAnalytics();
}
Hooray! Now we’ve successfully told Google Analytics and Google Tag Manager to load only when a user on our site has given us explicit permission to collect their data.
Testing Cookies
To test your cookies, you can use Google Chrome and this EditThisCookie Plugin. Once installed, a cookie icon will appear on your toolbar. Use that to check if the trackMe cookie is there.
This was originally a tutorial in Zesty.io’s documentation. Check out this article more detail throughout this process.
Want to dive further into GDPR Compliance and your website?
By Randy Apuzzo
Randy has had a penchant for computer programming from an early age and started applying his skills to build business software in 2004. Randy's stack of skills range from programming, system architecture, business know-how, to typographic design; which lends to a truly customer-centric and business effective software design. He leads the Zesty.io team as CEO.